Developing and deploying a Helm chart application in Okteto
Deploying applications in Kubernetes can be complicated. Even a simple application can require a series of interdependent components — namespaces, RBAC rules, ingress, services, deployments, pods, and secrets — each with one or more YAML manifests.
Helm is the package manager for Kubernetes applications. It lets you package, configure, and deploy applications onto Kubernetes clusters.
This tutorial shows you how to deploy a Helm chart application to Okteto. You push the application image to the Okteto Registry, create and configure a Helm chart, and then develop the deployed application in a remote Development Container.
Prerequisites
To follow this tutorial, you need:
- Access to Okteto, with the Okteto CLI installed and configured
- Familiarity with Kubernetes basics
Install Helm
You need the Helm command-line tool to create and deploy the application.
For macOS
brew install helm
For Linux
Debian/Ubuntu:
curl https://baltocdn.com/helm/signing.asc | sudo apt-key add -
sudo apt-get install apt-transport-https --yes
echo "deb https://baltocdn.com/helm/stable/debian/ all main" | sudo tee /etc/apt/sources.list.d/helm-stable-debian.list
sudo apt-get update
sudo apt-get install helm
For Windows
choco install kubernetes-helm
Building a Helm chart application
In this section, you create a Helm chart to deploy an already-built application. Helm chart applications depend on prebuilt container images, so you build and push the application image to a registry first.
Clone the application
In your terminal, clone the GitHub repository and make it the working directory:
git clone -b default https://github.com/okteto/recipe-app
cd recipe-app
The folder contains a prebuilt application alongside a Dockerfile, but no manifest for deploying the application to Kubernetes. You create a Helm chart for the application, but first build the image and push it to the Okteto Registry.
Building the application image
Build the image for this application from the Dockerfile to the Okteto Registry. Before building the image, set the Okteto context:
okteto context use https://okteto.example.com
Next, run the command to build the application:
okteto build -t okteto.dev/recipe-app:latest
The previous command builds and pushes the application image, so you can pull it from your Namespace.
Creating a Helm chart
To create a Helm chart, use the Helm command-line tool. In the application directory, run:
helm create chart
The command above creates a new folder containing:
chart/
├── Chart.yaml
├── charts
├── templates
│ ├── NOTES.txt
│ ├── _helpers.tpl
│ ├── deployment.yaml
│ ├── hpa.yaml
│ ├── ingress.yaml
│ ├── service.yaml
│ ├── serviceaccount.yaml
│ └── tests
│     └── test-connection.yaml
└── values.yaml
The Chart.yaml file contains basic information about the Helm chart. Change the name and description to:
name: recipe-app
description:  A recipe application built on FastAPI
This tutorial focuses on _helpers.tpl, service.yaml, deployment.yaml, and values.yaml.
The _helpers.tpl file defines variables used across your Kubernetes manifests. Instead of repeating variables such as annotations and labels in multiple manifests, you place them in the _helpers.tpl file.
Update the _helpers.tpl file to this:
{{/*
Expand the name of the chart.
*/}}
{{- define "chart.name" -}}
{{- default .Chart.Name .Values.nameOverride | trunc 63 | trimSuffix "-" }}
{{- end }}

{{/*
Create a default fully qualified app name.
We truncate at 63 chars because some Kubernetes name fields are limited to this (by the DNS naming spec).
If release name contains chart name it will be used as a full name.
*/}}
{{- define "chart.fullname" -}}
{{- if .Values.fullnameOverride }}
{{- .Values.fullnameOverride | trunc 63 | trimSuffix "-" }}
{{- else }}
{{- $name := default .Chart.Name .Values.nameOverride }}
{{- if contains $name .Release.Name }}
{{- .Release.Name | trunc 63 | trimSuffix "-" }}
{{- else }}
{{- printf "%s-%s" .Release.Name $name | trunc 63 | trimSuffix "-" }}
{{- end }}
{{- end }}
{{- end }}

{{/*
Create chart name and version as used by the chart label.
*/}}
{{- define "chart.chart" -}}
{{- printf "%s-%s" .Chart.Name .Chart.Version | replace "+" "_" | trunc 63 | trimSuffix "-" }}
{{- end }}

{{/*
Common labels
*/}}
{{- define "chart.labels" -}}
helm.sh/chart: {{ include "chart.chart" . }}
app.kubernetes.io/name: {{ include "chart.name" . }}
{{ include "chart.selectorLabels" . }}
{{- if .Chart.AppVersion }}
app.kubernetes.io/version: {{ .Chart.AppVersion | quote }}
{{- end }}
app.kubernetes.io/managed-by: {{ .Release.Service }}
{{- end }}

{{/*
Selector labels
*/}}
{{- define "chart.selectorLabels" -}}
app.kubernetes.io/name: {{ include "chart.name" . }}
app.kubernetes.io/instance: {{ .Release.Name }}
{{- end }}

{{/*
Create the name of the service account to use
*/}}
{{- define "chart.serviceAccountName" -}}
{{- if .Values.serviceAccount.create }}
{{- default (include "chart.fullname" .) .Values.serviceAccount.name }}
{{- else }}
{{- default "default" .Values.serviceAccount.name }}
{{- end }}
{{- end }}
The deployment.yaml manifest contains the instructions for deploying your application to Kubernetes. It comes prefilled and fetches values from the _helpers.tpl and values.yaml files. Update the containerPort in the containers section to 8080:
containers:
  - name: {{ .Chart.Name }}
    securityContext:
      {{- toYaml .Values.securityContext | nindent 12 }}
    image: "{{ .Values.image.repository }}:{{ .Values.image.tag | default .Chart.AppVersion }}"
    imagePullPolicy: {{ .Values.image.pullPolicy }}
    ports:
      - name: http
        containerPort: 8080
        protocol: TCP
Lastly, look at the values.yaml file. This stores the image name, replica count, and service configuration data. Update the image repository and tag from:
image:
  repository: nginx
  pullPolicy: IfNotPresent
  # Overrides the image tag whose default is the chart appVersion.
  tag: ""
to:
image:
  repository: $IMAGE_REGISTRY/recipe-app
  pullPolicy: IfNotPresent
  # Overrides the image tag whose default is the chart appVersion.
  tag: "latest"
In the code block above, replace $IMAGE_REGISTRY with:
okteto.dev/recipe-appif you used the Okteto Registry.- Your Docker Hub username if you pushed your image to Docker Hub.
Next, under the serviceAccount heading, set the create variable to false, since you aren't creating a service account:
serviceAccount:
  # Specifies whether a service account should be created
  create: false
  # Annotations to add to the service account
  annotations: {}
  # The name of the service account to use.
  # If not set and create is true, a name is generated using the fullname template
  name: ""
Next, change the service type and port to:
service:
  type: LoadBalancer
  port: 8080
You have successfully configured your application's Helm chart. The next step is to deploy it to Okteto.
Deploying to Okteto
To deploy your application to Okteto, return to the base directory in your terminal and run:
helm install recipe-app chart/
The console returns:
NAME: recipe-app
LAST DEPLOYED: Mon Dec 13 19:09:29 2021
NAMESPACE: youngestdev
STATUS: deployed
REVISION: 1
NOTES:
1. Get the application URL by running these commands:
  export NODE_PORT=$(kubectl get --namespace youngestdev -o jsonpath="{.spec.ports[0].nodePort}" services recipe-app-chart)
  export NODE_IP=$(kubectl get nodes --namespace youngestdev -o jsonpath="{.items[0].status.addresses[0].address}")
  echo http://$NODE_IP:$NODE_PORT
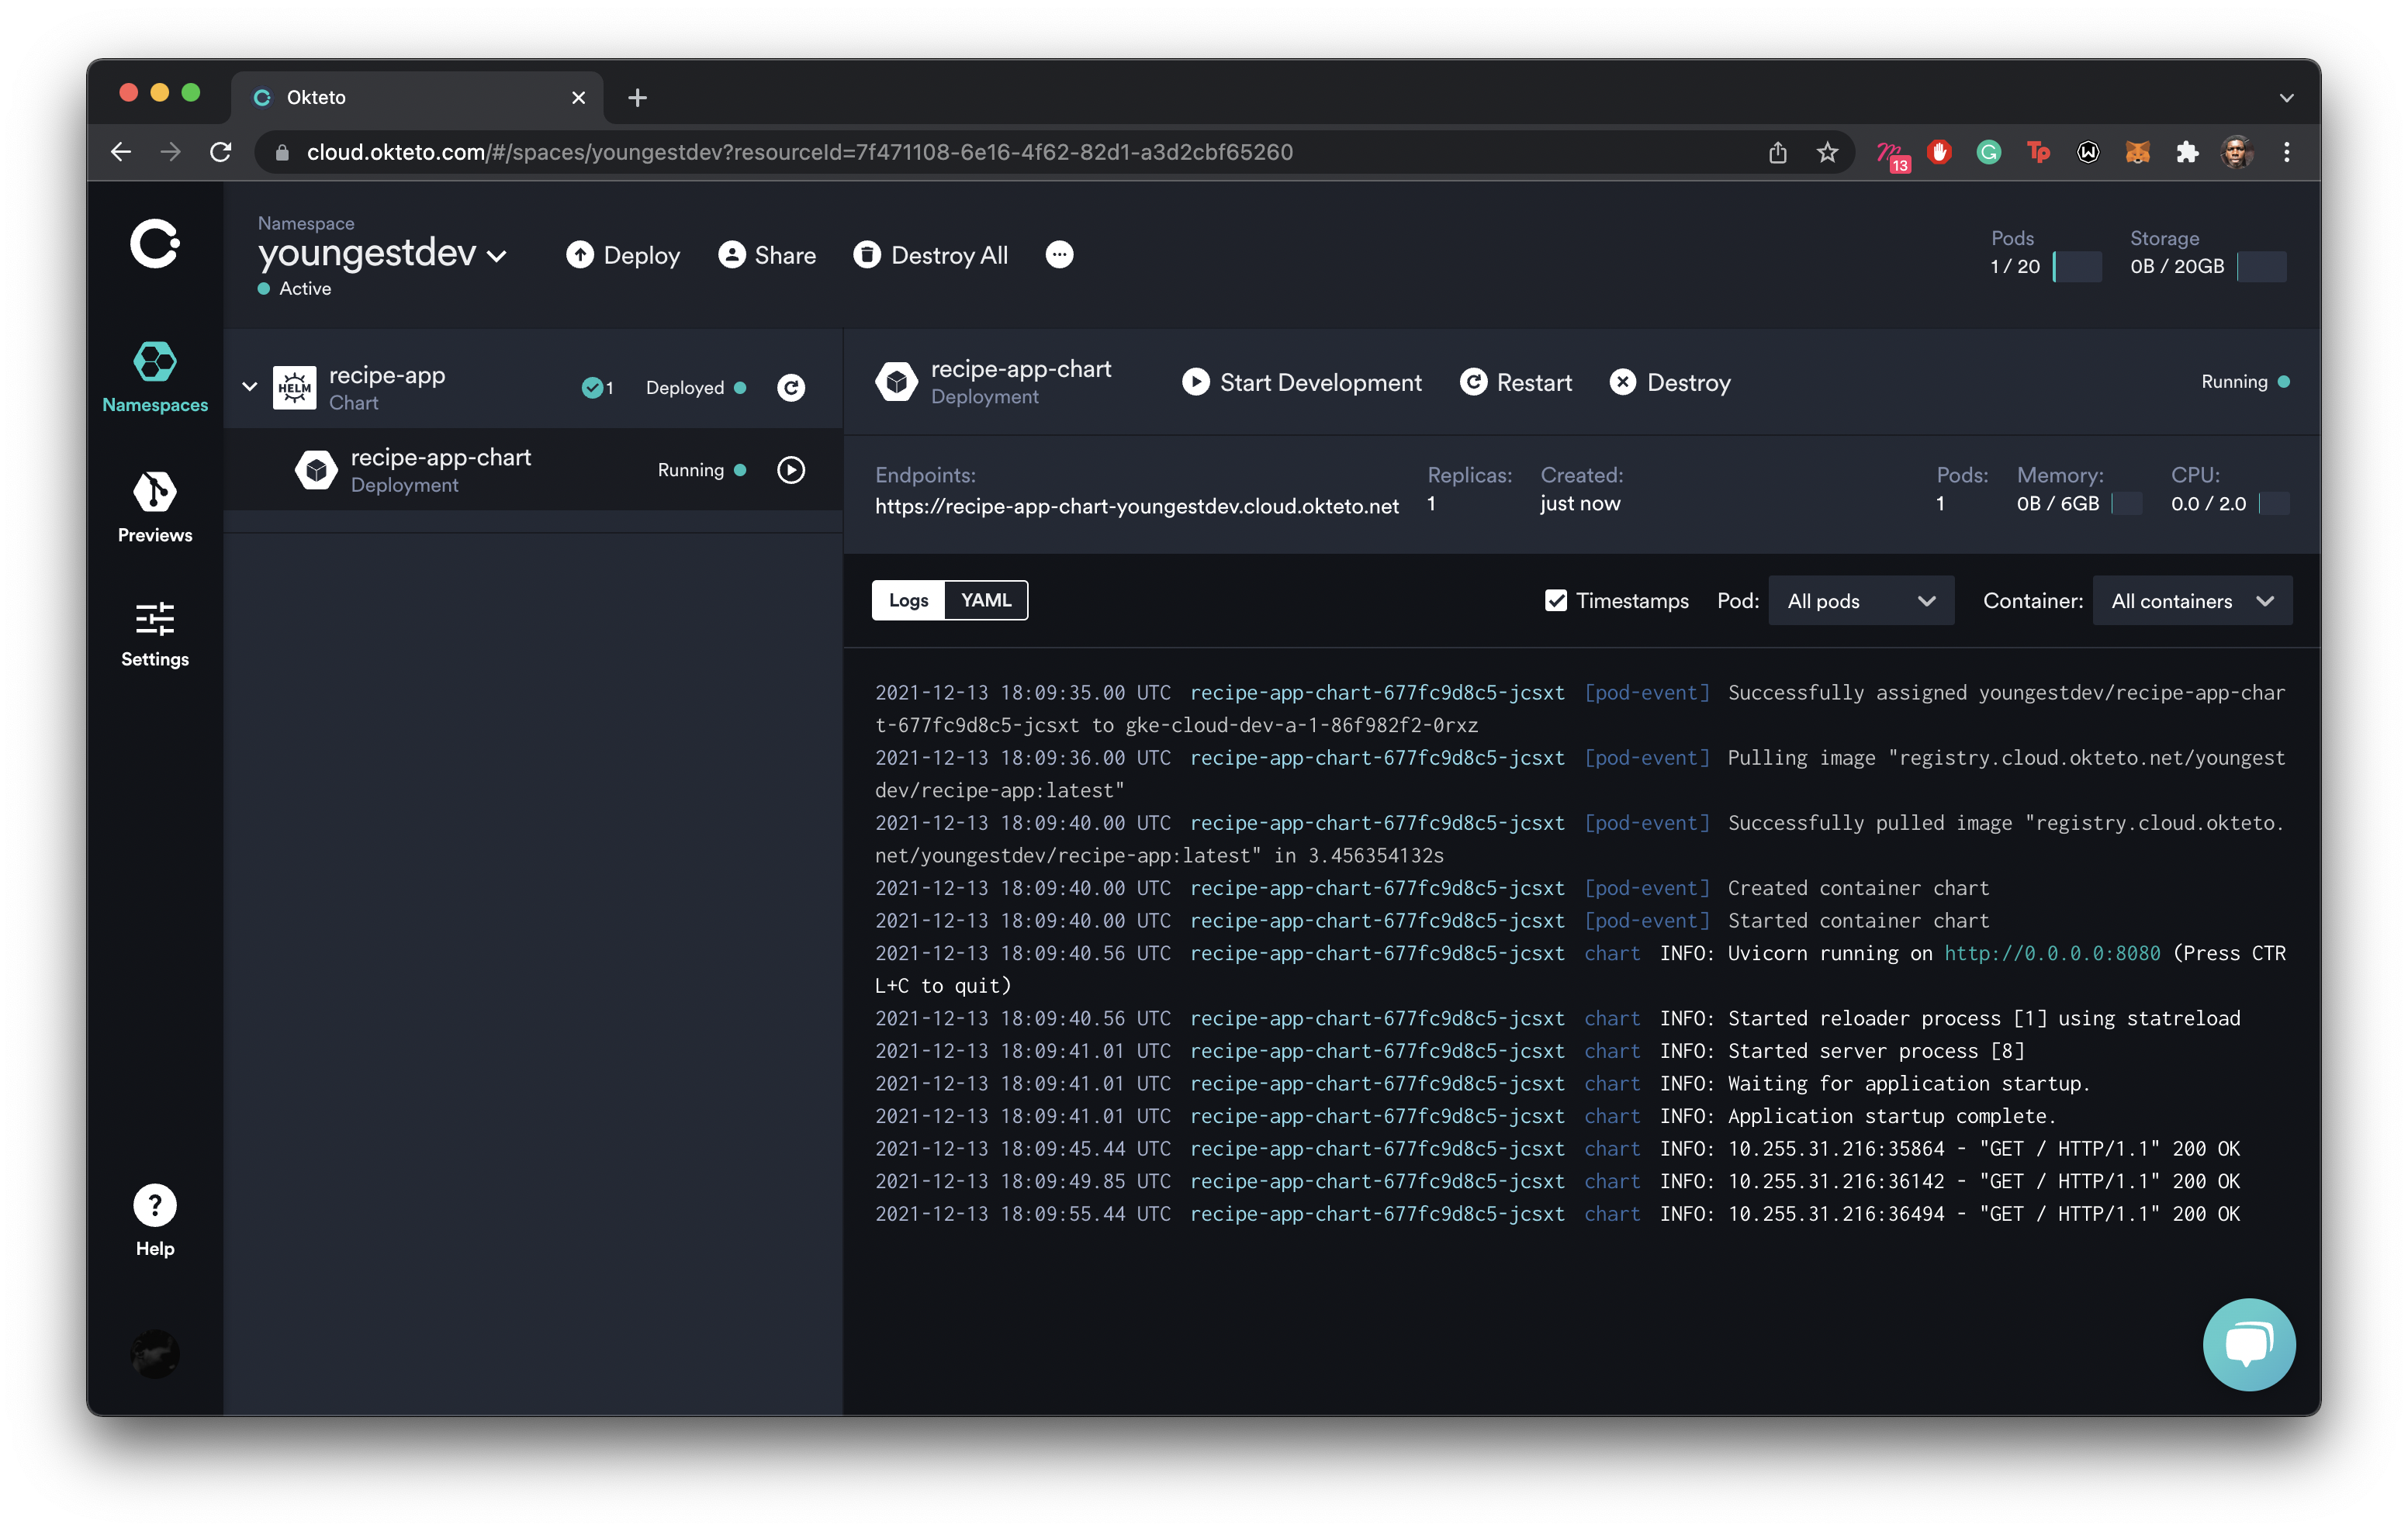
This tells you the application has been deployed. In the Okteto dashboard, you can see the deployed application:
Development environments for Helm applications
You can also remotely develop Helm chart applications in Okteto. Create a Development Container to verify this:
okteto init
Select the deployed application:
  i  Using youngestdev @ okteto.example.com as context
This command walks you through creating an okteto manifest.
It only covers the most common items, and tries to guess sensible defaults.
See https://www.okteto.com/docs/reference/okteto-manifest/ for the official documentation about the okteto manifest.
Use the arrow keys to navigate: ↓ ↑ → ←
Select the resource you want to develop:
  ▸ recipe-app-chart
The okteto.yaml manifest is created. Start your Development Container by running:
okteto up
  i  Using youngestdev @ okteto.example.com as context
  ✓  Persistent volume successfully attached
  ✓  Images successfully pulled
  ✓  Files synchronized
    Context:   okteto.example.com
    Namespace: youngestdev
    Name:      recipe-app-chart
    Forward:   8080 -> 8080
    Reverse:   9000 <- 9000

root@recipe-app-chart-okteto-c88fff58f-pt8c8:/app#
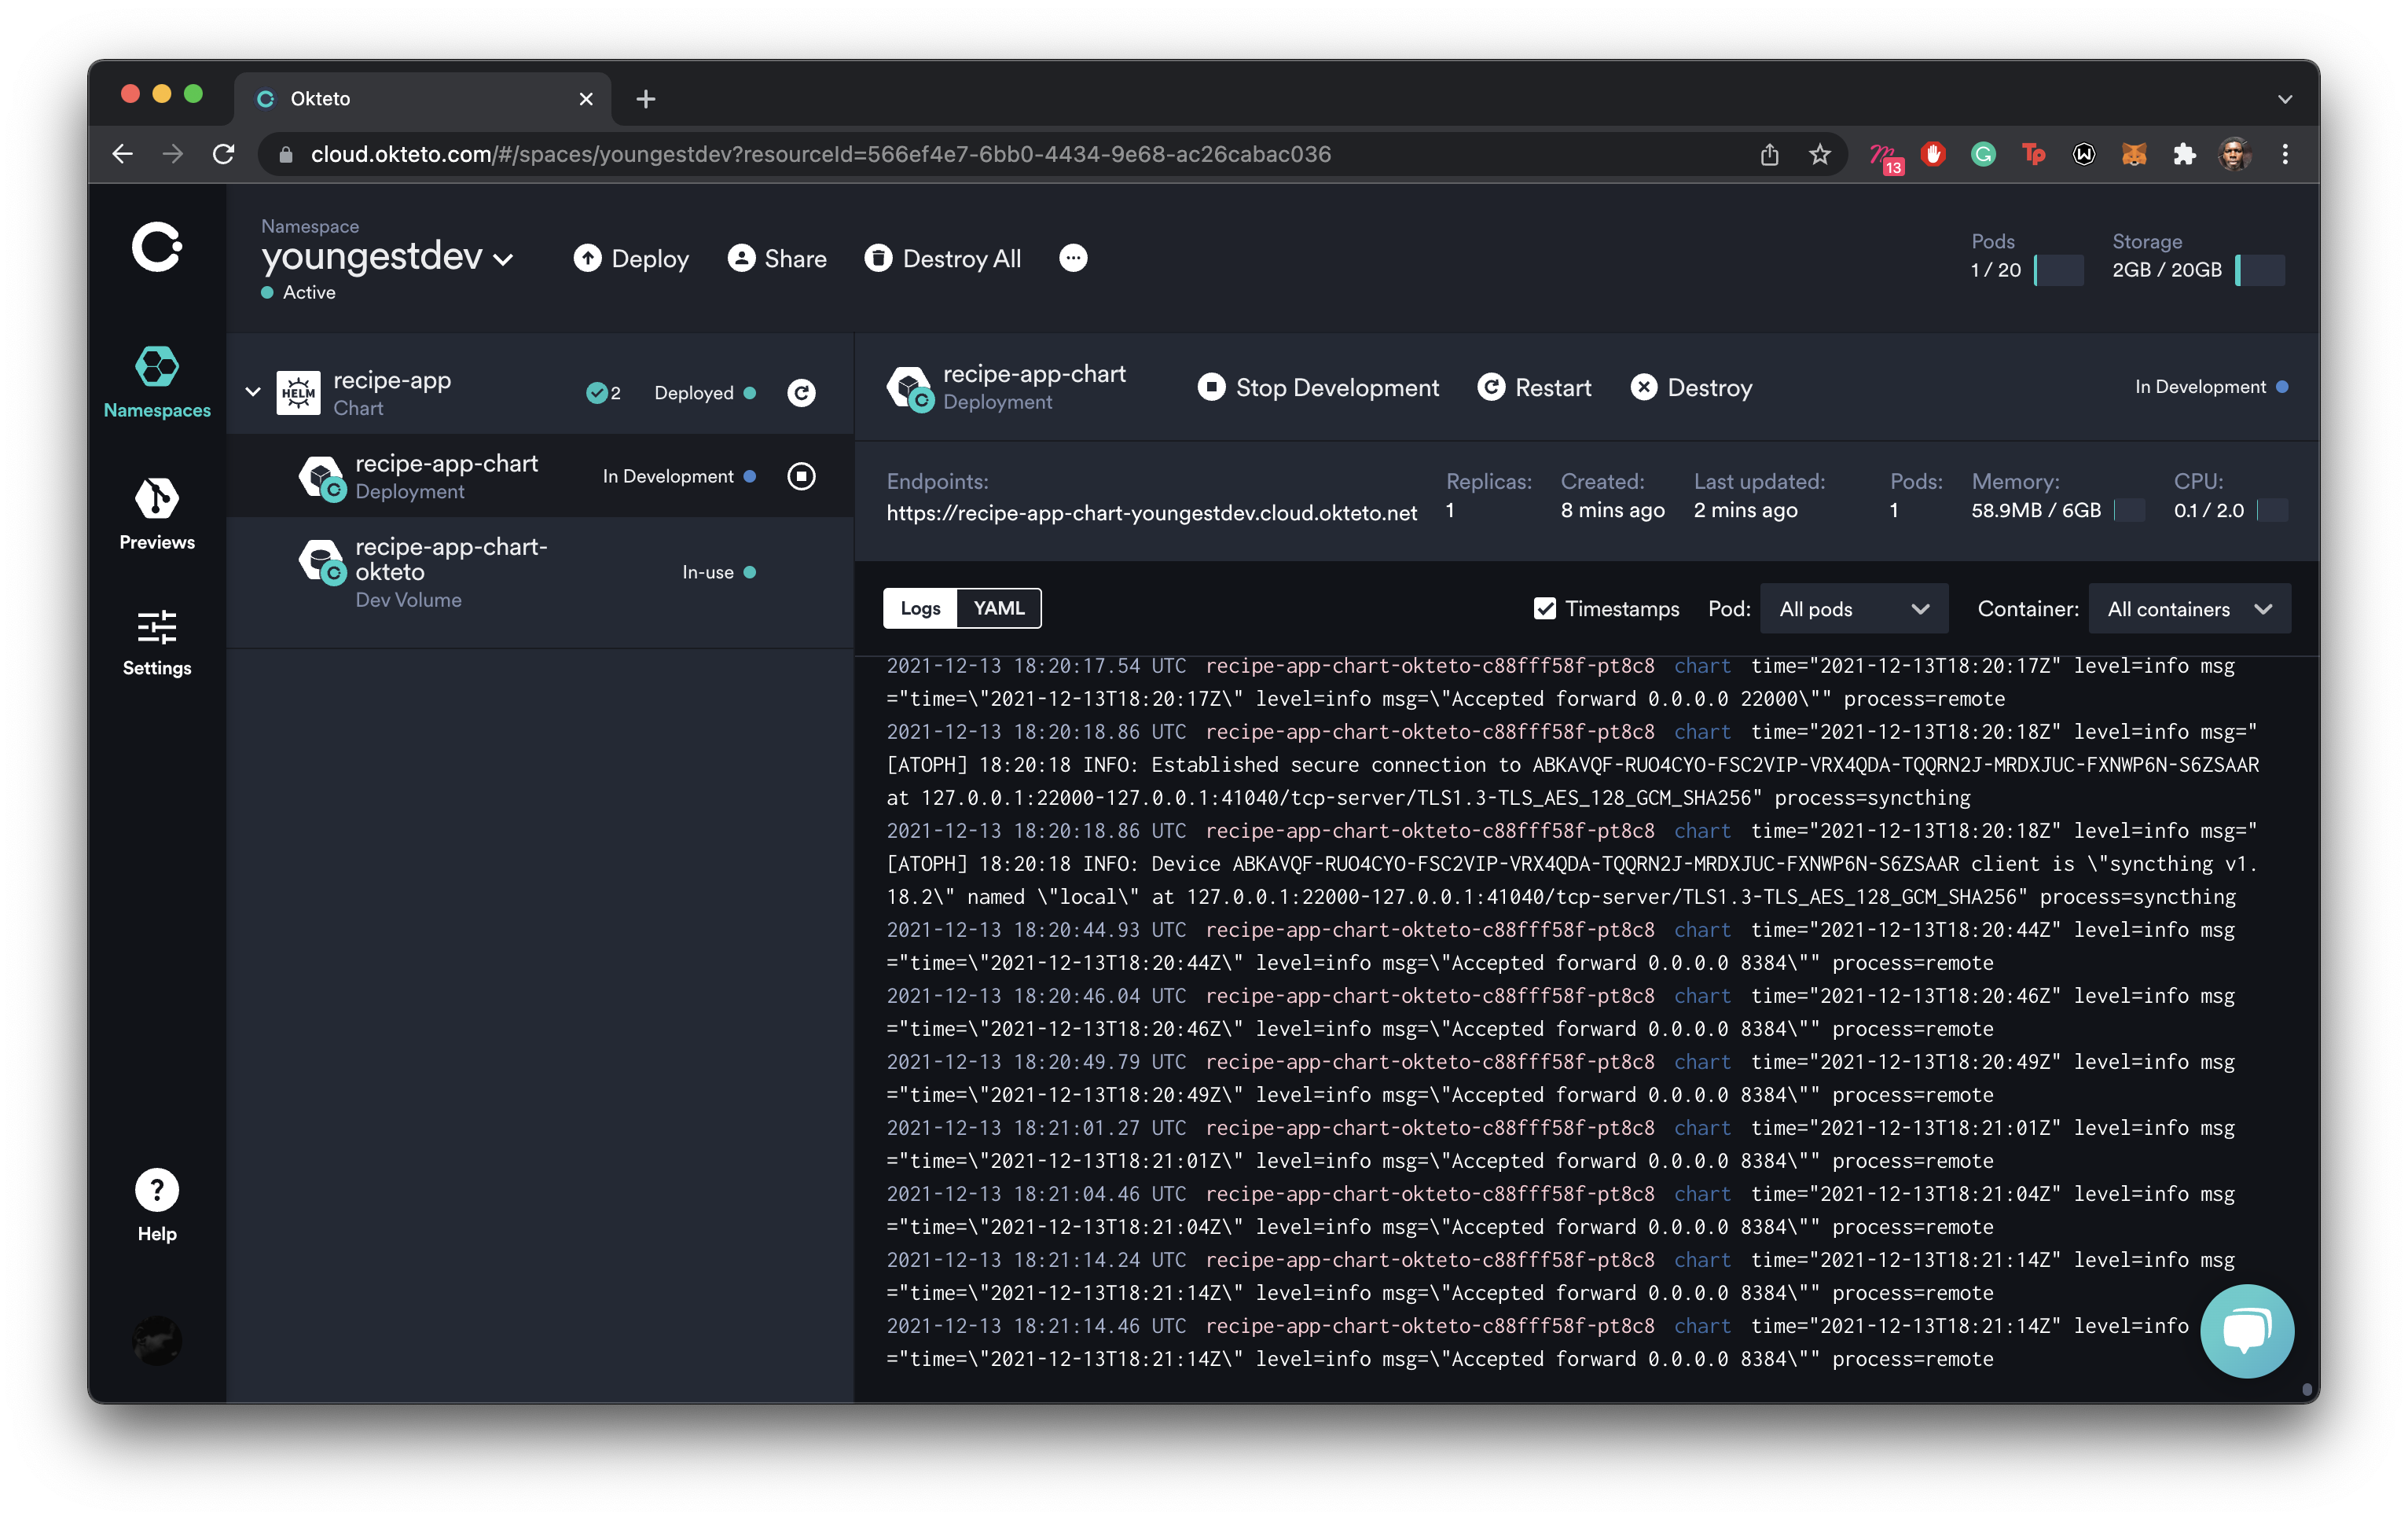
You have verified that your application can be developed remotely. In the Okteto dashboard, the state of the application changes to In Development:
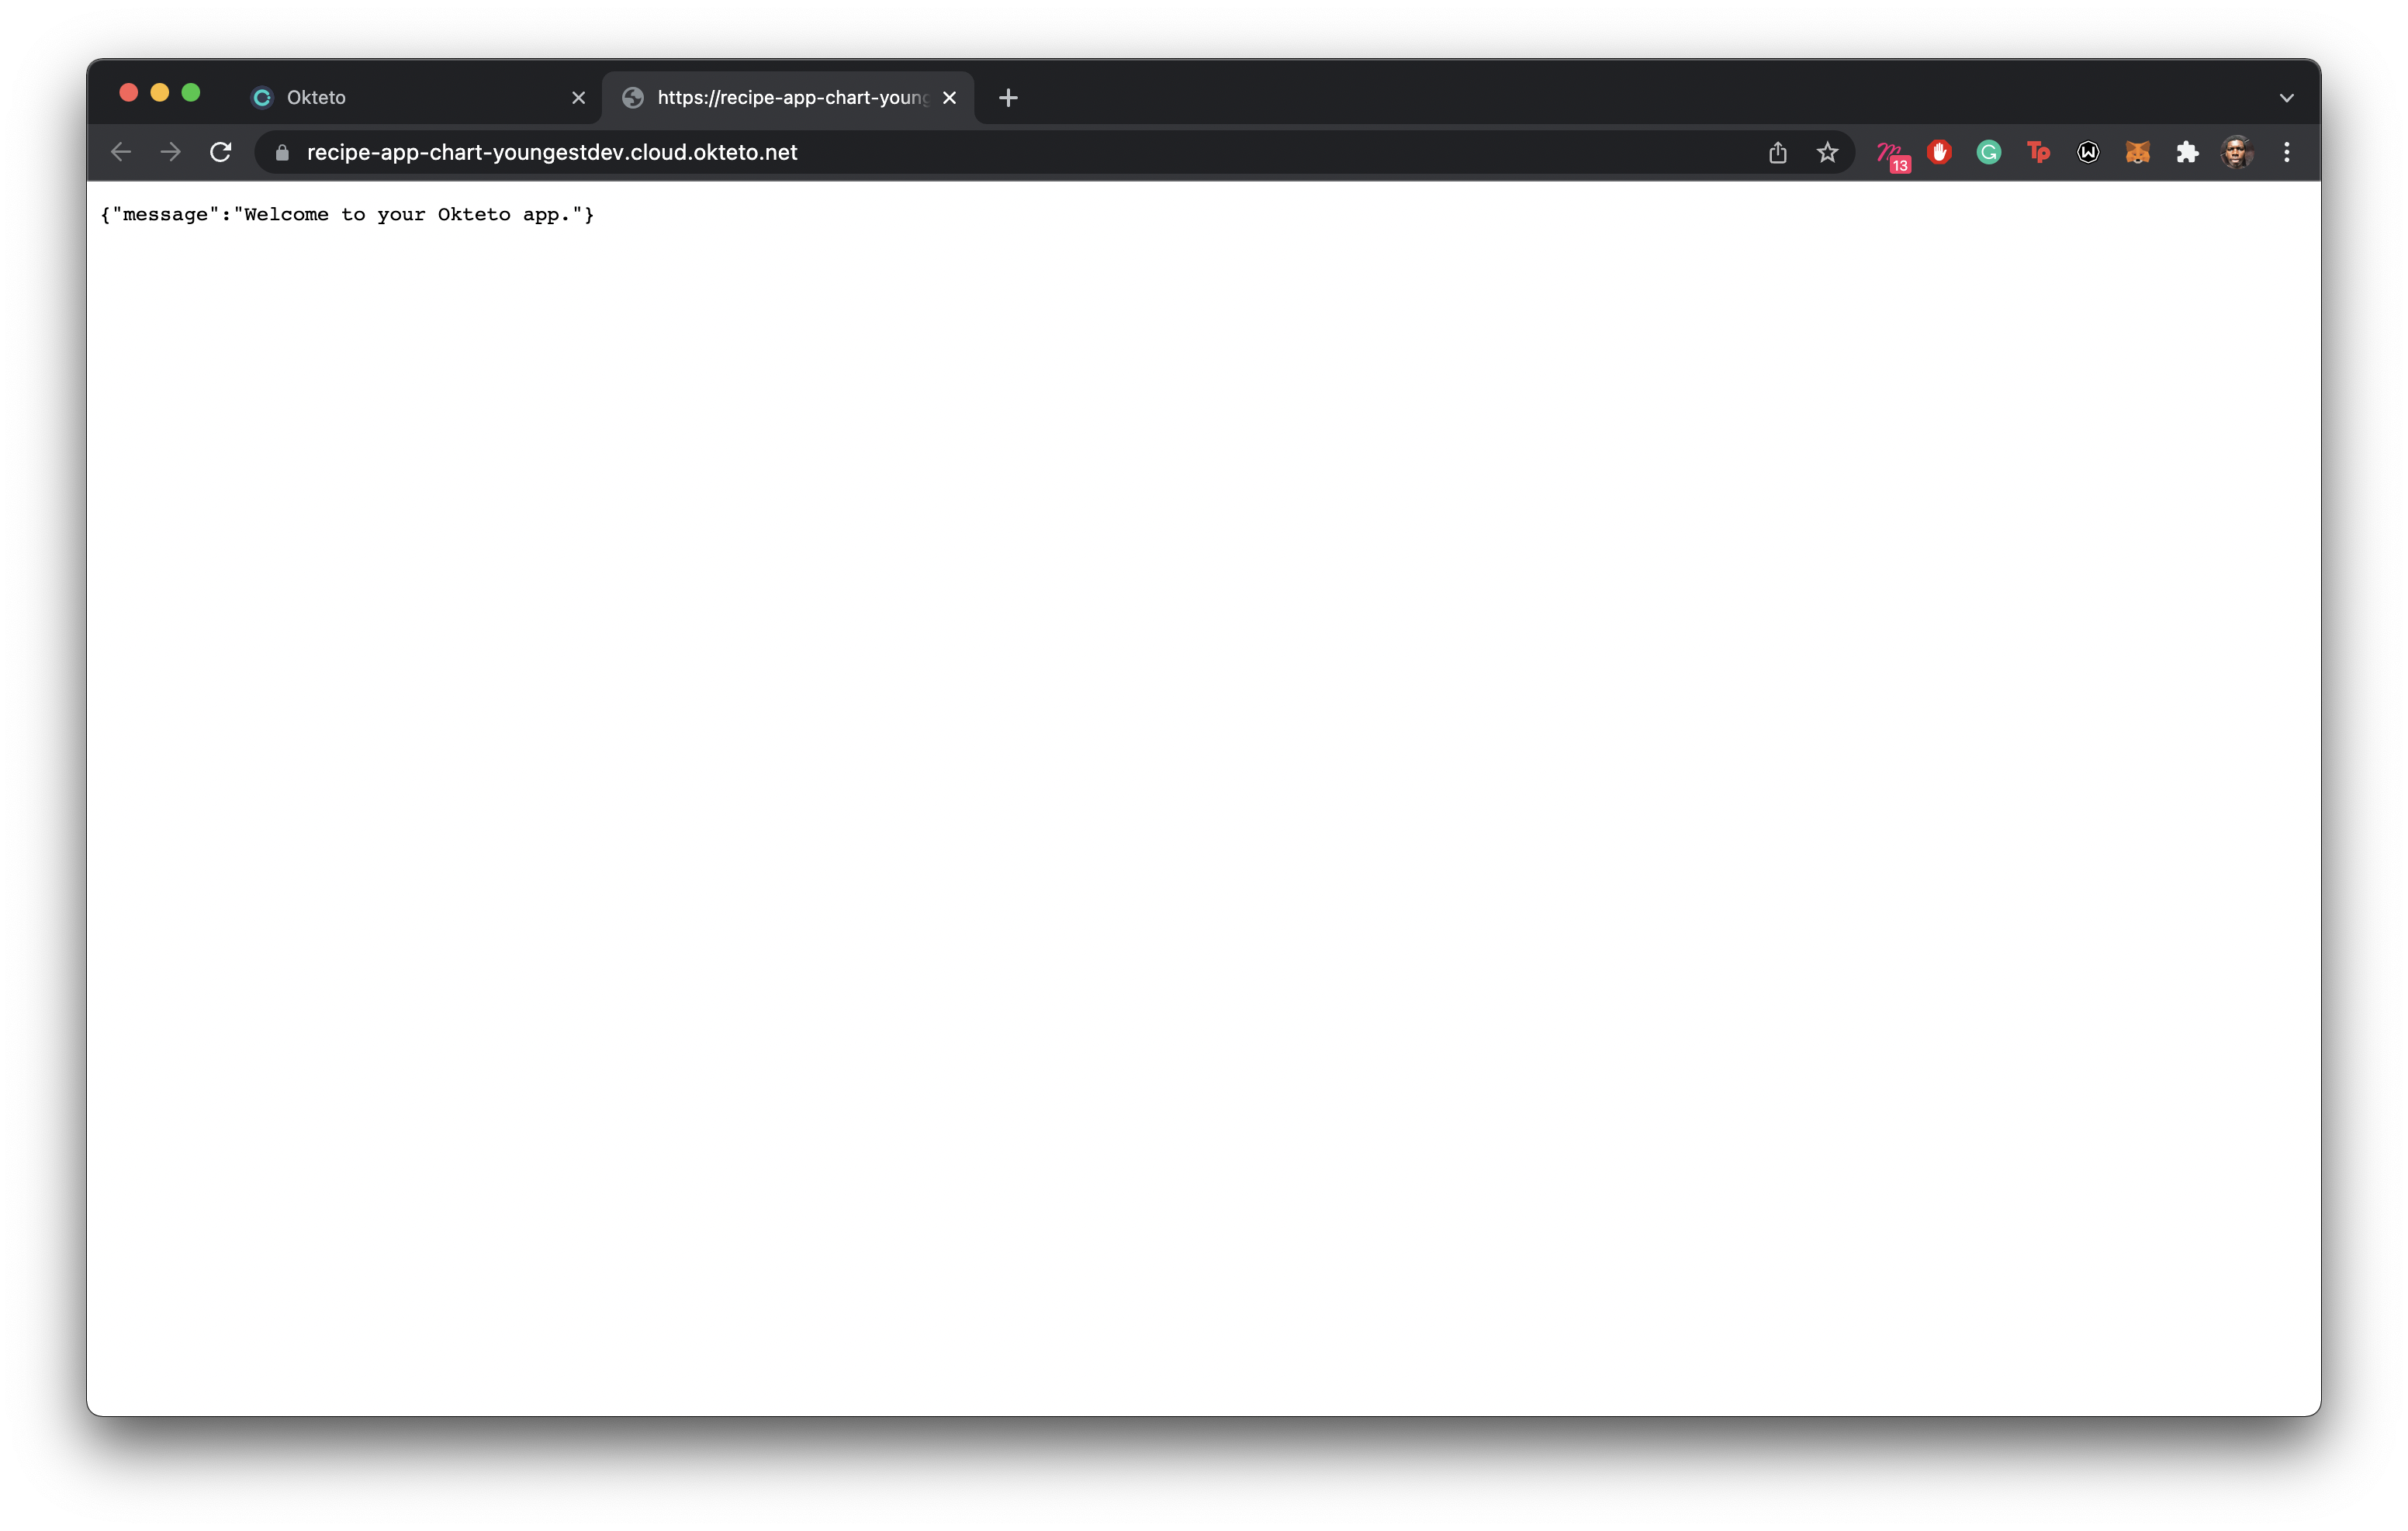
Start your application remotely:
python3 main.py
INFO:     Uvicorn running on http://0.0.0.0:8080 (Press CTRL+C to quit)
INFO:     Started reloader process [80] using statreload
INFO:     Started server process [82]
INFO:     Waiting for application startup.
INFO:     Application startup complete.
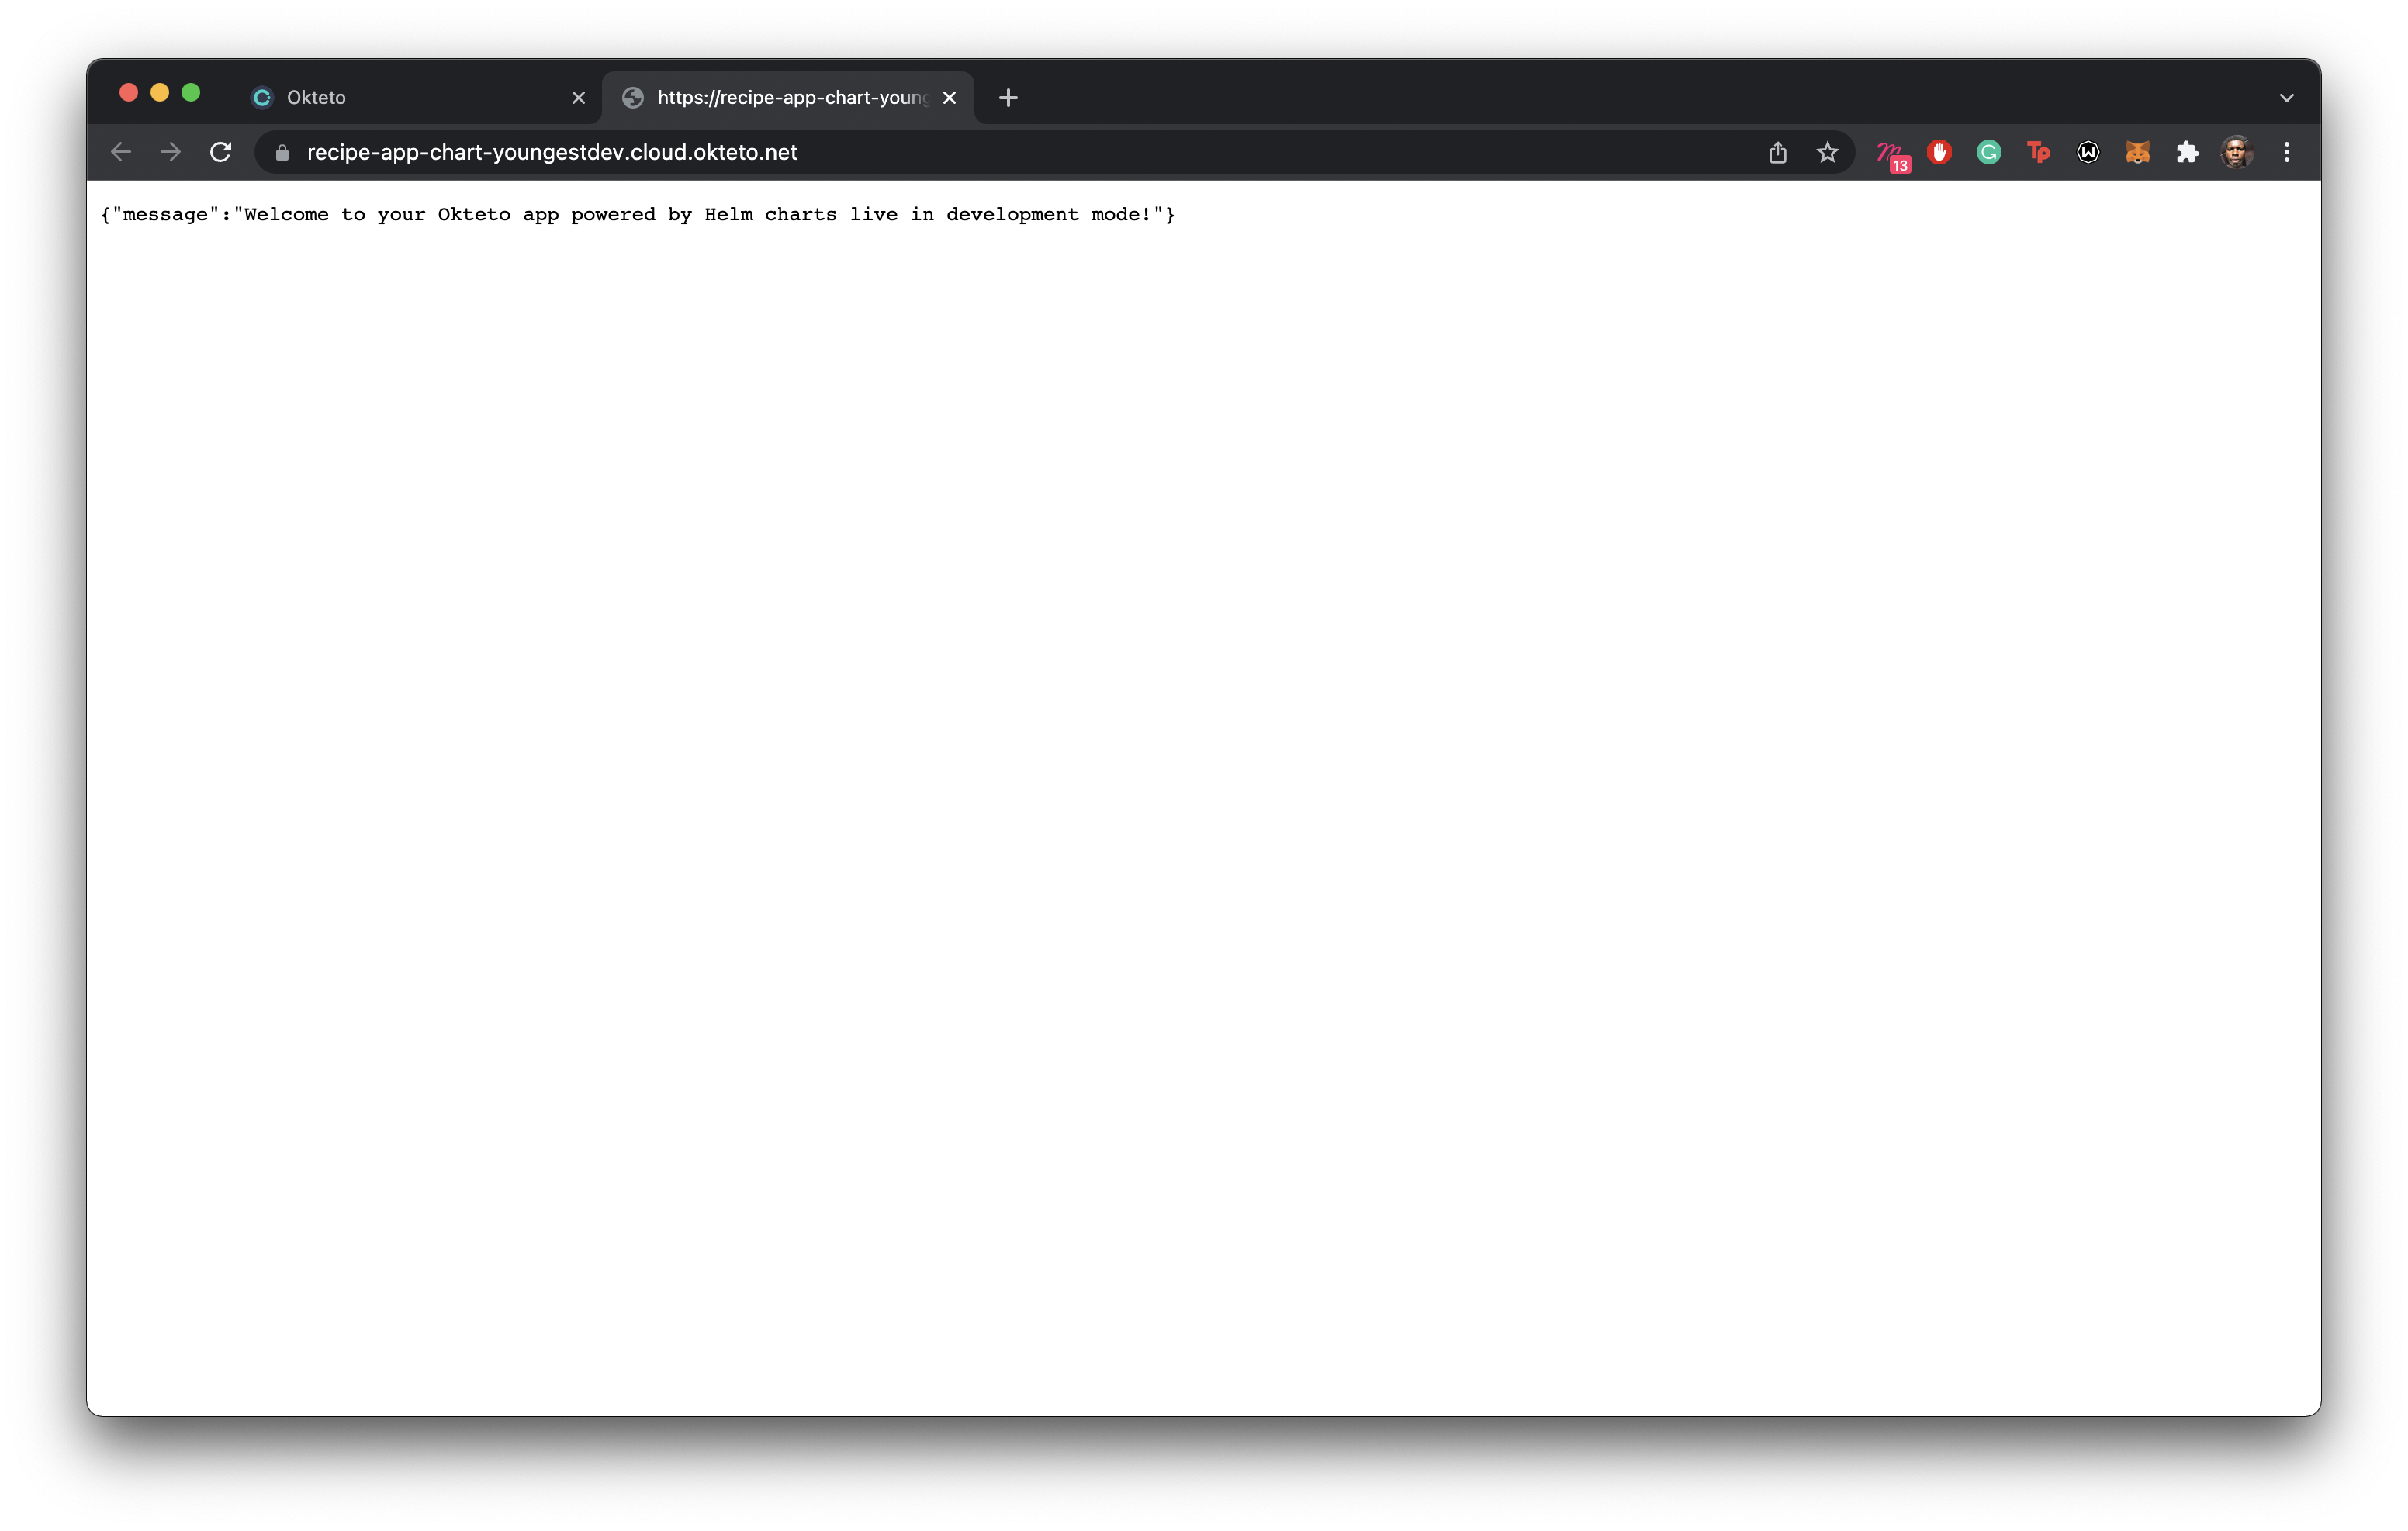
The development environment updates the application on every file change. Change the welcome message in app/api.py:
@app.get("/", tags=["Root"])
def get_root() -> dict:
    return {
        "message": "Welcome to your Okteto app powered by Helm charts live in development mode!"
    }
Okteto synchronizes the changes automatically, and the application updates:
You have successfully deployed a Helm chart application and developed it using Okteto's remote development environment.
Conclusion
In this tutorial, you built an application image and pushed it to the Okteto Registry, created a Helm chart to deploy the application to Kubernetes, and developed the deployed application remotely in a Development Container.
You can find the code used in this tutorial on GitHub.